Project GT Junior
continued...

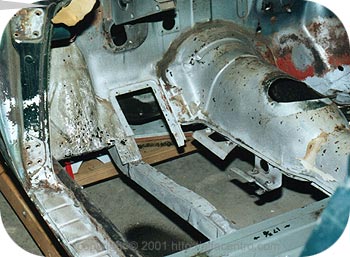
Now attention turns to the front floor. Area above left foot will get attended to first.

Master cylinder / pedal box bracket and rear transmission mount are cleaned up and clearly visible in this shot. Floor will be welded to flanges as original.

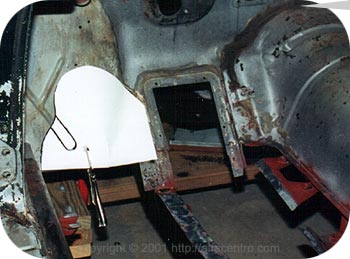
As usual a cardboard template starts the process. Panel has reinforcing bead which extends into the corroded area; this will be duplicated in the repair.

Cardboard is cheap and a lot easier to work than steel, so it pays to get it right in the template stage. Compound curves can be facilitated by cutting darts; dart lines indicate where to stretch the metal.

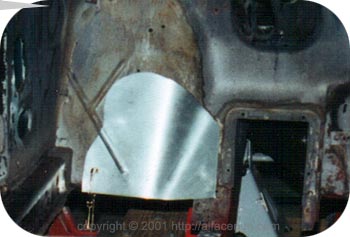
Fitting the repair panel, as always before cutting away garbage. Bead in 20 gauge steel created with hand-cranked bead roller.
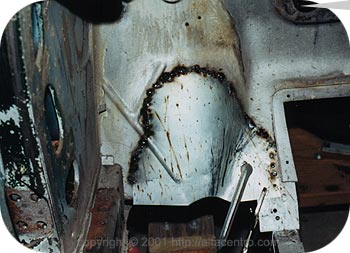
Welding it in with many small tacks to avoid warpage.
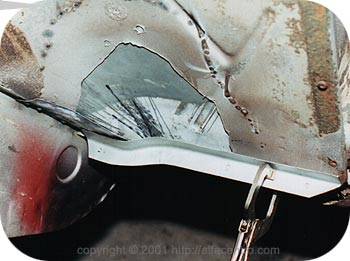
Exterior side. Fabricating new flange where rear of front fender/firewall meets front floor. Eventually these seams will be welded up.
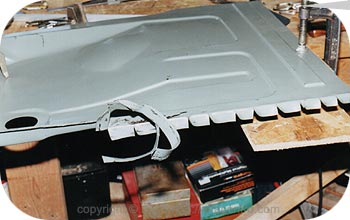
Trimming edges off front floor. Vertical relief cuts make it possible to cut near right angle edge with hand shears.

Continued... p8 p9 p10 p11 p12 p13 p14

back to part 1

Questions? Comments?

Copyright © 2001 AlfaCentro & Forza Modern Media. All rights reserved. Neither AlfaCentro.com, it's publisher, FORZA Modern Media, LLC., or the individual article authors makes any warranties, expressed or implied, that the techniques, modifications, and procedures outlined in these stories are free of errors and omissions, meet applicable safety standards, or are suitable for the purposes described. The publisher and authors also expressly disclaim all liability for damages that may arise from the use of information presented in these articles.

alfacentrofeaturestech q&aresourcesclassifiedsabout usannounce list